Grilled Eggplant & Pepper Dip

roasted eggplant dip

Yesterday was a pretty epic food prep day in my kitchen. While at the grocery store in the morning, I was irresistibly drawn to a gorgeous eggplant and was inspired to make some kind of roasted eggplant dip/spread/ something…. I also got one red and one yellow pepper to roast alongside the eggplant.

Before I get to the details of how I made this, I just want to express very clearly that I do not measure anything. So the “quantities” I include in this “recipe” are estimates at best.

Ingredients:

1 whole eggplant

1 red pepper

1 yellow pepper

1 onion, roughly chopped

5 cloves garlic

extra virgin olive oil (approx 2-3 tbs)

balsamic vinegar (approx 2-3 tbs)

cumin (1-2 tsp)

salt & pepper to taste

Procedure:

Since I had just grilled some chicken and the grill was already hot, I decided to “roast” the eggplant and the peppers on the grill. I just put the veggies directly on the racks, and grilled them over very low heat (approx 300) for about 45 minutes, turning occasionally. I knew they were done once the peppers were charred all the way around and the eggplant was soft to the touch.roasted veg

Once the veggies were off the grill, I set them aside to cool down a bit. While I was waiting, I chopped up an onion and peeled some garlic and tossed them into a 400 degree oven to roast for about 20 minutes.

I peeled and seeded the peppers, scooped the flesh out of the eggplant, and put everything into the food processor. I added the roasted onions and garlic, salt and pepper, and a few glugs of olive oil (that is a very precise measurement), and then blitzed the processor for a few seconds.

When I tasted the mixture, there was something missing. If there had been a lemon in my fridge, I would have added some lemon juice to brighten up the flavor, but there wasn’t, so I added some balsamic vinegar instead. After a few more seconds in the food processor, I was satisfied with the taste and the texture, so it was done.

If there had been parsley available, I would have chopped that up and mixed it in as well.

Let me be clear: this stuff tastes amazing. I ate it on top of chicken last night, and am planning to do the same for lunch today. It would also be phenomenal on burgers, or with lamb, or on pasta (if you eat pasta). You can also just eat it with a spoon. It’s that good.

Enjoy!

Spicy Citrus Instant Pot Chicken

img_0021

It’s been an embarrassingly long while since I’ve actually posted anything to the blog, but that’s not because I haven’t been cooking. It’s mainly because I never write anything down, so I can’t remember exactly what I put in a given dish.

Last night, when I made this spicy citrus chicken, I didn’t write anything down either, but I think I mainly remember the quantities of what I added. I’ve gotten much more confident with just throwing a bunch of stuff in the instant pot, as the results have been consistently amazing. And since some people out there have been clamoring for recipes, I decided that I’d make an effort to actually post one.

4 frozen chicken breasts (yes, you can actually start them from frozen. That’s one of the absolute best things about the IP.)

1/2 cup orange juice

juice of 1 lime

2 tbs gluten free soy sauce or coconut aminos

5 shakes fish sauce (probably about 1-2 tsp)

2 tbs chili powder

2 tsp paprika

1 tsp cumin

1 tsp sea salt

1/2 tsp ground black pepper

I also added the remnants of a bottle of Primal Kitchen Honey Mustard Salad Dressing. See, this is why I don’t post recipes. I throw random stuff in the pot, it comes out amazing, and I’m never able to recreate it exactly.

And here’s why the IP is awesome… all you have to do is throw everything in the pot and turn it on. Because the chicken was frozen, I added a few minutes to the recommended “poultry” cook time, which is 15 minutes. I let this go for 22 minutes, and it was perfect. I quick released the pressure, and that was that.

Rosemary Chicken Potato Soup

I made this soup a few weeks ago, but I didn’t write down any of the quantities. Well, I finally got around to making it again, and this time I made sure to pay attention to what I was doing.

This soup was incredibly delicious, and since I made it in the crock-pot, it was also incredibly easy.

And look how pretty it is, even before it’s cooked!

soup for blog

Ingredients:

3 lbs chicken thighs, cut into 1-2″ pieces

1 onion, roughly chopped

3 celery stalks, chopped

3 carrots, peeled and chopped (I used rainbow carrots because that’s what was in the fridge, but any carrots will do.)

2 cups diced tomatoes (I used fresh cherry tomatoes that I cut in half. I would imagine that canned tomatoes would work just fine as well.)

2 tbs tomato paste

3 cloves garlic, smashed

1 lb potatoes, cut into pieces about the same size as the chicken (I used a potato medley from Trader Joe’s. You can see some of the different types of potatoes in the “before” picture.)

2 cups chicken broth

2 tbs dried oregano

1 tbs garlic powder

2 tbs dried shallots

2 tbs vinegar (I used a Pinot Grigio white wine vinegar that I happened to have around, but a nice balsamic would work just fine as well.)

Salt & pepper to taste

2 sprigs of fresh rosemary

Process:

Put everything in the crock-pot and cook on low for 6-8 hours. Seriously. That’s it.

Alright…  here’s a little more detail.

I put all the veggies in first in the order they appear in the ingredient list. chicken soup for blogThen I added the broth and the spices, then the potatoes, and then the chicken. I mixed everything around a little bit and then tucked in the rosemary spears.

I served it with some flat bread that I made with cassava flour, and it was a perfect meal.


#NewThing2016 Cassava Flour!

Lately, I’ve been hearing more and more about cassava flour as a fantastic gluten free flour alternative. Now, those of you who know me know that I don’t do much (or any) baking. Ever. Something about all the precise measuring just really doesn’t appeal to me; that’s just not the way I operate in the kitchen. (Incidentally, the more recipes I come up with, though, the better I’m having to be about measuring ingredients.) So I wasn’t sure that I would actually use the Cassava flour to its full potential.

But I was finally persuaded to buy some Otto’s Cassava Flour because I was wanting to try a new tortilla recipe that I saw online at forkandbeans.com.

cassava flour

The recipe I found online is also the recipe on the bag of Cassava Flour, so I figured that it had to be good.  It only has 3 ingredients and was super quick and easy to make. That being said, the texture of the tortillas wasn’t quite right for the enchiladas that I planned to make with them, so instead, I decided that they were flat bread and served them with an amazing Rosemary Chicken & Potato Soup that I made last night, the recipe for which will be up soon.

The flat bread was absolutely delicious; Mike ate it with butter, and it was a perfect accompaniment to the soup.

I have plans to create a gluten free Naan out of this flour, so stay tuned for that as well.

And before you go, here are a few fun facts about cassava.

*Cassava is also referred to as Yuca.

*It is a root vegetable that, in its raw form, actually contains the toxin, cyanide. Take home lesson: don’t eat raw cassava.

*Cassava flour is made by peeling, drying, and grinding the cassava root. Tapioca flour is also made from the cassava root, but it is made by a different process that involves washing and pulping the root. Tapioca flour and cassava flour are NOT interchangeable.

Weekend Recipe Roundup

Every weekend I do food prep for the week ahead. There are a couple of things that I make every weekend because they go in Jackson’s cooler for daycare each day, almond milk and egg muffins; and then I typically make at least one meal that will have leftovers and one big batch of something in the crockpot that we can eat for a few meals during the week. If I’m really planning ahead, I’ll also prep something that I can take to school for lunch so that more of the leftovers from dinner can be used for another meal at home.

Typically, Friday night dinner is whatever is left in the fridge. This Friday, though, because I had managed to go grocery shopping during the day, I actually made a really nice (but extremely simple) dinner. I’ll start with that recipe and then move forward throughout the weekend.

Friday night: Pan Seared Scallops with Roasted Green Beans (I don’t make that much seafood, because Mike doesn’t like it, but since he was out of town, Jackson and I got to eat some delicious scallops.)

scallops

There isn’t really a “recipe” for this meal. I roasted some green beans with olive oil, garlic salt, and pepper at 425 for about 20 minutes.

For the scallops, I melted some ghee in a large frying pan over medium high heat, and once the pan was hot, I added the scallops. After the scallops were in the pan, I sprinkled them with garlic salt, paprika, and some black pepper. I let them cook for about 5 minutes and then flipped them over and let them cook for another 2-3 minutes.

On Friday night I took some pork shoulder and some chicken breasts out of the freezer in anticipation of the cooking that I planned to do over the rest of the weekend. I also soaked about 3 cups of raw almonds in water overnight because I wanted almond milk in my coffee on Saturday morning, and I had used the last of it for Jackson’s cooler on Friday.

On Saturday morning I made the almond milk. Although my inspiration for the almond milk I make every week comes from this recipe from Nom Nom Paleo, I don’t measure anything, and I always use at least 2-3 cups of almonds so that one batch can get us through the week.

Almond Milk

2-3 cups raw almonds

3-4 cups of water, plus extra to soak the almonds

a splash of vanilla extract

a dash of sea salt

Soak the almonds overnight in a large bowl or pitcher. I use a pyrex measuring cup.

Strain the almonds, rinse them well, and put them in your blender. I have a Vitamix, and it works very well for this application (as it does for everything).

Add 3-4 cups of water, vanilla, and salt to the blender. PUT ON THE LID (please don’t forget this crucial step), and blend on high for about 2 minutes.

Now yalmond milkou have to strain out the almond meal. I use a nut milk bag for this, but cheese cloth works fine as well. Pour the blended milk into your bag, and squeeze the milk out into a pitcher. You’ll have to use some muscle here, but it’s definitely worth it.

You’ll be left with almond meal, and I know that some people dry this out at low temps in the oven and use it for almond flour, but I’ve never been quite this motivated, so I just throw it out.

The resultant milk is creamy and delicious, and it keeps in the fridge all week. I’d imagine it would last up to two weeks, but we always use it up faster than that.

For Saturday night dinner, I made some pork meatballs with spaghetti squash.

I hacked the spaghetti squash in half with the amazing cleaver that I got for Christmas and popped it in the crock-pot on high for 3 hours.

For the meatballs, I used about 2.5 pounds of a pork shoulder that I had in the freezer. After thawing it, I cut it into approximately 1 inch cubes. I laid the cubes on a baking sheet covered with parchment paper and put them in the freezer for about 30 minutes. Then I put the meat into my food processor to grind it. I did it in 4 batches so as not to overfill the food processor. It ended up being a nice coarse grind, which I like for meatballs.

Pork Meatballs

2.5lbs ground pork

1 bunch green onions, chopped

1 tbs grated fresh ginger

3 tbs coconut aminos

1 tsp fish sauce

3 tbs sesame seeds

1 tbs chopped cilantro

1 tsp ground black pepper

pork meatballsPreheat your oven to 425.

Using your hands, mix all the ingredients together in a big bowl. Once the ingredients are thoroughly mixed, form into balls and place on a rack on a rimmed baking sheet. I ended up with 28 meatballs. Bake at 425 for 20-25 minutes.

I served with spaghetti squash and broccoli, and it was an amazingly delicious meal. There are also plenty of leftovers for lunches early in the week.


On Sunday morning, before I even made breakfast, I got the crock-pot going with dinner for that evening: Hatch Green Chile Chicken.

I made a version of this dish a couple of weeks ago and was astonished by how fantastic  (and extremely easy) it was, so I decided to make it again and write everything down this time. A few months ago, I had bought a package of frozen hatch chiles at Trader Joe’s withohactch chilesut even really knowing what they were. When I made the first incarnation of this meal, I just tossed some chicken thighs and these chiles in the crock-pot and hoped for the best. As I said, it turned out great, and I got a lot of mileage out of that batch, using the leftovers for enchiladas a few days later.


Hatch Green Chile Chicken

2-3 lbs chicken (I used thighs the first time and breasts this time)

1 onion, diced

6-8 cloves of garlic, chopped

2 tbs cumin

2 tsp sea salt

1 tsp ground black pepper

1 cup pico de gallo

1 package Hatch Chiles (from TJ’s)

Put onions and garlic in the bottom of your crock-pot. Add the chicken. Add spices evenly over the chicken. Pour in the pico and the Hatch chiles. Cook on low for 8 hours. See, super easy. 🙂

And the last thing I made on Sunday was a batch of egg muffins. I make these every week, and send two each day for Jackson’s breakfast. He loves them, and it makes prepping his food each night for the next day that much quicker.

There’s no real recipe for these: I just beat up 12 eggs with some salt and pepper and pour them into my silicone muffin cups. This time, I added some crumbled bacon that was left over from breakfast, and also a little bit of shredded cheese that we had in the fridge. I baked them for 25 minutes at 350, and that was that. eggs muffins

So while that may seem like a lot of food prep to do over the weekend, I know that we’ll make it through Tuesday with leftovers (I hope).

Oh, and one more thing that I did was to chop up a bunch of bell peppers, onions, and carrots to add to my canned salmon for lunches at school. That way I’m sure to get some veggies in during the day.

Have a great week!

Roasted Cauliflower and Garlic Soup

Recently, I’ve taken to eating soup for breakfast. Last week, I made a big batch of curried butternut squash soup. I over spiced it a bit, though, and although it was delicious, it wasn’t perfect, so I didn’t want to post the recipe on the blog.

This week’s invention, a roasted cauliflower and garlic soup, is downright amazing. Even though there’s an entire head of garlic in the soup, since it’s roasted, the flavor is not overpowering; rather, it’s mellow and delicious.

Ingredients:

1 head garlic, roasted (see process below)

2 heads cauliflower, broken into pieces

1 onion, coarsely chopped

3 celery sticks, chopped

2 large shallots, chopped

1 can of coconut milk

4 cups chicken stock

1 tsp dried thyme

1 tsp garlic powder

salt & pepper to taste

Process:

For the roasted garlic: Preheat your oven to 400. Peel the excess paper off of the head of garlic and trim about 1/4″ off the top of the head so that you can see the cloves. (I forgot to take a picture, but I found this one online at gimmesomeoven.com.)

garlic-prep Drizzle some olive oil over the top of the cloves, allowing it to sink down in between them. Wrap the garlic in tin foil, and roast for 45-60 minutes. Take it out of the oven and allow it to cool while you’re preparing the rest of the soup.


Once the garlic comes out of the oven, sprinkle your cauliflower florets with salt and pepper, and roast them for 20-25 minutes on a big baking sheet. I roasted mine in a little bit of bacon grease, but olive oil would work fine as well.

While the cauliflower is roasting, sauté your diced onion, celery, and shallots in a large pot with some ghee or other cooking fat of choice. Add the roasted garlic, coconut milk, cauli soup
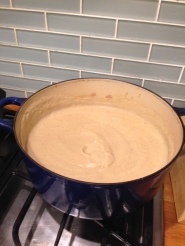
chicken stock, and spices and allow to simmer until the cauliflower comes out of the oven. Add the cauliflower to the pot and simmer for about 10 minutes. Once the cauliflower is nice and soft, puree everything with an immersion blender until it’s smooth and season to taste with salt and pepper. If you don’t have an immersion blender, let it cool a bit and then pop it in your blender and blitz until it’s smooth.

Enjoy!

Happy New Year!

new-year-2016

I am typically not a huge fan of New Year’s Resolutions. I don’t know if that’s a product of my own failure to adhere to them in the past, or of my dislike of the idea that people seem to feel the need to create a “New You” in the new year. I am pretty happy with who I am overall, and although there are certainly some habits that I’d like to change or implement, I’m really not looking to fundamentally change who I am as a person.

This year, however, I am doing some new things, and I’ve created #newthing2016 to mark my efforts. One of my new things is to use Instagram more, so if you follow me over there @primalmamalifestyle, you’ll see all about it.

So far, I think I only have 3 new things that I’ve implemented. Well, maybe 4.

The first is that I’m drinking a green smoothie with Vital Proteins Collagen Peptides (almost) every morning. I actually started this before the new year but I’m counting it anyway. I like it because the collagen is great for my skin and hair, and the kale and spinach are just great in general. And I think I need more greens in my diet, so this is doing the trick.

Thing two (and I can’t even believe I’ve had to resort to this) is jogging with Jackson. We found a used jogging stroller on Craigslist, and Mike got me some new running shoes for Christmas. The reality of my life right now is that I really don’t have the time to get to the gym on any kind of consistent basis. But I need to work out. I don’t feel good if I’m inactive. And my need to work out eclipses my hatred of running right now. So I’m doing it.

Thing three, which I alluded to above, is using Instagram more to build my following and promote my blog. Another new thing is that I am going to post more on the blog. I haven’t made this one official yet, but it’s definitely in the plan.

And the final #newthing that I’m doing isn’t really a habit, but it’s definitely something that I will be using more often, and that is silicone baking cups. I can’t believe I’ve only just gotten my first set. They. Are. Amazing. I made egg muffins yesterday, and instead of having to hack them out of my muffin tin with a chisel, they popped out of the baking cups effortlessly and beautifully. I am never going back. Ever.

So that’s it for now…  Stay tuned for more content coming your way soon. Recipe development is in the works.

Halloween Party Menu (a week later)

I decided in August that we were going to have a Halloween party this year. Because I was still on summer vacation at that point, it seemed like a great idea, and there was no doubt in my mind that I could pull it off. Knowing myself, however, there was also no doubt in my mind that if I didn’t announce it right away, I would back out and not have a party because the end of October is such a crazy time at school, and it’s so much work to host a successful pargiant spiderty. I created the event on Facebook right away so that I couldn’t change my mind later.

True to form, when the week of Halloween arrived, I still really hadn’t done any menu planing. I had decorated the house, though, so at least that part was done (Jackson’s favorite decoration was this giant spider balloon, which is still floating around the living room).

And I did have a vague idea of what I wanted to make. I was going to keep it pretty simple, mostly finger foods, and buy some gluten free cupcakes from a local bakery. And booze. Of course.

The menu I finally settled on was deviled eggs (more on those later), pumpkin chili with ground beef, chicken wings (I ordered 12 lbs, and they ALL got eaten!), Mike’s famous cheese dip and chips (not Paleo), and a veggie platter with homemade Paleo ranch dressing.

This chili recipe is one I’ve made before, but in the past I’ve used ground turkey. I was uncertain that ground beef would work, but it was a huge hit with the guests and with Jackson. He’s been eating the leftovers non-stop!

For the wings, I used Nom Nom Paleo’s recipe for her Magic Wings (including her Magic Mushroom Powder), and they turned out absolutely incredible. As I mentioned earlier, I had ordered 12 lbs of wings, and when I opened up the package, I discovered that the wings looked like this.

whole chicken wingsI was a little alarmed, but I quickly searched out a youtube video on how to butcher chicken wings and got to work.

For the Paleo ranch dip, I used another Nom Nom Paleo recipe for mayonnaise (this technique is pretty universal). Then I whisked in coconut milk until the consistency was what I wanted, added about 2 tsp each of garlic powder and onion powder, and about 1 tsp of dill, and voila! Ranch dressing!

And finally, the deviled eggs… This was the dish I actually spent the most time on. It all started out simply enough. I boiled and peeled the eggs, cuspider eggst them in half, and tossed the yolks in a bowl. For every 6 eggs, I used 4 of the yolks and added 1 avocado for the filling. I added salt, pepper, lime juice, and some garlic power, and then piped the resulting concoction back into the eggs (I used a ziploc bag with the corner cut off to do the piping). The finishing touch was what took all the time; I cut up olives to look like spiders and put them on top of every. single. egg. This took a pretty long time, but it was totally worth it. They looked awesome and were really tasty too.

The party was a huge success. It was great to see some friends that I haven’t seen in a long time, the kiddos had a blast running all over the place, and the food was amazing.

And here’s a gratuitous picture of Jackson and Mike in their costumes.

halloweenies

Waffles!

I know, I know…  It’s hard to believe. I’m typically not a huge fan of “paleo” versions of “standard” foods like waffles and pancakes, but somehow I got it into my head a few weeks ago that it would be fun to have waffles for breakfast on Sunday morning.

I remembered hearing about a waffle recipe on one of the podcasts I listen to, so I decided to hunt it down and give it a try. This recipe by Brittany Angell is truly amazing! (I made the second version, the Paleo Waffles.) Brittany Angell is known for being an incredible baker, but since I really don’t bake, ever, I haven’t ever checked out any of her recipes before. But based on the success I’ve had with these waffles, I will definitely look to her recipes again if I ever do decide to bake something.

wafflesThis past Sunday, I also made syrup from fresh blueberries and peaches. A few weeks ago, I had too much fruit in the fridge, and it was in danger of going bad, so I just chopped up the peaches and threw them and the blueberries into the freezer.  To make the syrup, I put about 2-3 cups of frozen fruit into a small sauce pan with 1/2 cup of water and heated it slowly over low heat. Once the fruit was thawed, I mashed it up a bit and then blitzed it with an immersion blender so we wouldn’t have lumpy syrup. And then I just let it reduce until it reached the right consistency. I did add about a teaspoon of maple sugar, but when I make this again, I’ll probably skip that step as the fruit was plenty sweet on its own.

And so a new tradition is born: Waffle Sunday!

Back to School…

Well, it’s that time of year again, when I feel like it’s only been summer vacation for about 5 minutes, but somehow, it’s time to go back to school again.

Now don’t get me wrong, I really love teaching. A lot. But I also REALLY love being on vacation. More than anything.

But it’s ok…  Once school actually starts, it’ll take about 3 days before I forget that summer vacation was even a thing, and I’ll be totally immersed in the excitement of the school year.

Since Jackson has still been going to daycare a few days a week while I’ve been off, I figured that this was an opportune time to write a post about what I pack in his cooler each day. (I still have time now to write fun blog posts before the craziness of the school year sets in for real…)

He gets three meals, Breakfast, Lunch, and Snack, every day, and I also pack a thermos with milk and a bottle of water for him.

I’ve posted a couple of pics recently over on Instagram and Facebook of his meals: daycare food 1 daycare food 2

These are pretty standard days of food for him. Breakfast is always a couple of fried eggs and some fruit. I fry the eggs in ghee the night before, and even though he has to eat them cold the next morning, he still seems to enjoy them.

Lunch is almost always leftovers from the night before. On the left, it’s pan seared salmon with roasted veggies, and on the right, it’s roasted chicken breast with shredded brussels sprouts sautéed with bacon and a balsamic glaze.

For snack, he usually either gets prosciutto (I buy it at Costco: the only ingredients are pork and salt) or organic grass-fed hot dogs from Applegate Farms. I buy those at Trader Joe’s, and they are very delicious. The pickles are also from TJ’s; there are no weird additives or unnatural colors added. The plantain chips are Inka Chips that I get from Thrive Market. (Thrive Market is a fantastic new resource that has wholesale pricing on lots of paleo friendly pantry items. I can’t recommend them highly enough. If you sign up through the link above, I get a bonus for referring a friend, and once you’re a member, you can refer friends too!).

As we get into the school year, I’ll try to post periodic updates about his meals, especially if I come up with something super interesting. In the meantime, enjoy these last few days of summer vacation!